Spring Security OAuth授權服務器
- java
- Spring Security
- OAuth
1.簡介
OAuth是描述授權過程的開放標準。它可用於授權用戶訪問API。例如,REST API可以僅限制具有適當角色的註冊用戶的訪問。
OAuth授權服務器負責對用戶進行身份驗證,並發布包含用戶數據和適當訪問策略的訪問令牌。
在本教程中,我們將使用Spring Security OAuth Authorization Server實驗模塊實現一個簡單的OAuth服務器。
在此過程中,我們將創建一個客戶端服務器應用程序,該應用程序將從REST API中獲取Tutorial文章列表。客戶端服務和服務器服務都將需要OAuth身份驗證。
2.授權服務器實施
讓我們從查看OAuth授權服務器配置開始。它將用作文章資源和客戶端服務器的身份驗證源。
2.1依賴關係
首先,我們需要在pom.xml文件中添加一些依賴關係:
<dependency>

 <groupId>org.springframework.boot</groupId>

 <artifactId>spring-boot-starter-web</artifactId>

 <version>2.4.3</version>

 </dependency>

 <dependency>

 <groupId>org.springframework.boot</groupId>

 <artifactId>spring-boot-starter-security</artifactId>

 <version>2.4.3</version>

 </dependency>

 <dependency>

 <groupId>org.springframework.security.experimental</groupId>

 <artifactId>spring-security-oauth2-authorization-server</artifactId>

 <version>0.1.0</version>

 </dependency>
2.2。配置
application.yml文件中server.port屬性來配置身份驗證服務器將運行的端口:
server:

 port: 9000
之後,我們可以轉到Spring bean配置。首先,我們需要一個@Configuration類並導入OAuthAuthorizationServerConfiguration 。在配置類內部,我們將創建一些特定於OAuth的bean。第一個將是客戶端服務的存儲庫。在我們的示例中,我們將使用RegisteredClient構建器類創建一個客戶端:
@Configuration

 @Import(OAuth2AuthorizationServerConfiguration.class)

 public class AuthorizationServerConfig {

 @Bean

 public RegisteredClientRepository registeredClientRepository() {

 RegisteredClient registeredClient = RegisteredClient.withId(UUID.randomUUID().toString())

 .clientId("article-client")

 .clientSecret("secret")

 .clientAuthenticationMethod(ClientAuthenticationMethod.BASIC)

 .authorizationGrantType(AuthorizationGrantType.AUTHORIZATION_CODE)

 .authorizationGrantType(AuthorizationGrantType.REFRESH_TOKEN)

 .redirectUri("http://localhost:8080/login/oauth2/code/articles-client-oidc")

 .scope("articles.read")

 .build();

 return new InMemoryRegisteredClientRepository(registeredClient);

 }

 }
我們正在配置的屬性是:
- 客戶端ID – Spring將使用它來標識哪個客戶端正在嘗試訪問資源
- 客戶端密碼-客戶端和服務器已知的秘密,可在兩者之間提供信任
- 身份驗證方法–在我們的示例中,我們將使用基本身份驗證,即用戶名和密碼
- 授權授予類型–我們希望允許客戶端生成授權代碼和刷新令牌
- 重定向URI –客戶端將在基於重定向的流中使用它
- 範圍–此參數定義客戶端可能具有的授權。在我們的案例中,我們只有一篇–
articles.read
每個授權服務器都需要其令牌的簽名密鑰,以在安全域之間保持適當的邊界。讓我們生成一個2048字節的RSA密鑰:
@Bean

 public JWKSource<SecurityContext> jwkSource() {

 RSAKey rsaKey = generateRsa();

 JWKSet jwkSet = new JWKSet(rsaKey);

 return (jwkSelector, securityContext) -> jwkSelector.select(jwkSet);

 }


 private static RSAKey generateRsa() {

 KeyPair keyPair = generateRsaKey();

 RSAPublicKey publicKey = (RSAPublicKey) keyPair.getPublic();

 RSAPrivateKey privateKey = (RSAPrivateKey) keyPair.getPrivate();

 return new RSAKey.Builder(publicKey)

 .privateKey(privateKey)

 .keyID(UUID.randomUUID().toString())

 .build();

 }


 private static KeyPair generateRsaKey() {

 KeyPairGenerator keyPairGenerator = KeyPairGenerator.getInstance("RSA");

 keyPairGenerator.initialize(2048);

 return keyPairGenerator.generateKeyPair();

}除了簽名密鑰,每個授權服務器還需要具有唯一的發行者URL。通過創建ProviderSettings bean,我們將其設置為端口9000 http://127.0.0.1
@Bean

 public ProviderSettings providerSettings() {

 return new ProviderSettings().issuer("http://127.0.0.1:9000");

}最後,我們將使用帶有@EnableWebSecurity註釋的配置類來啟用Spring Web安全模塊:
@EnableWebSecurity

 public class DefaultSecurityConfig {


 @Bean

 SecurityFilterChain defaultSecurityFilterChain(HttpSecurity http) throws Exception {

 http.authorizeRequests(authorizeRequests ->

 authorizeRequests.anyRequest().authenticated()

 )

 .formLogin(withDefaults());

 return http.build();

 }


 // ...

}在這裡,我們正在調用authorizeRequests.anyRequest().authenticated()以要求對所有請求進行身份驗證,並且通過調用formLogin(defaults())方法來提供基於表單的身份驗證。
此外,我們將定義一組用於測試的示例用戶。為了這個示例,讓我們創建一個只有一個管理員用戶的存儲庫:
@Bean

 UserDetailsService users() {

 UserDetails user = User.withDefaultPasswordEncoder()

 .username("admin")

 .password("password")

 .build();

 return new InMemoryUserDetailsManager(user);

 }
3.資源服務器
現在,我們將創建一個資源服務器,該服務器將從GET端點返回文章列表。端點應僅允許根據我們的OAuth服務器進行身份驗證的請求。
3.1依賴關係
首先,讓我們包括所需的依賴項:
<dependency>

 <groupId>org.springframework.boot</groupId>

 <artifactId>spring-boot-starter-web</artifactId>

 <version>2.4.3</version>

 </dependency>

 <dependency>

 <groupId>org.springframework.boot</groupId>

 <artifactId>spring-boot-starter-security</artifactId>

 <version>2.4.3</version>

 </dependency>

 <dependency>

 <groupId>org.springframework.boot</groupId>

 <artifactId>spring-boot-starter-oauth2-resource-server</artifactId>

 <version>2.4.3</version>

 </dependency>
3.2 配置
在開始執行代碼之前,我們應該在application.yml文件中配置一些屬性。第一個是服務器端口:
server:

 port: 8090
接下來,是時候進行安全配置了。 ProviderSettings bean中配置的主機和端口為身份驗證服務器設置正確的URL:
spring:

 security:

 oauth2:

 resourceserver:

 jwt:

issuer-uri: http://127.0.0.1:9000現在,我們可以設置我們的Web安全配置。再次,我們要明確地說,對文章資源的每個請求都應被授權並具有適當的article.read權限:
@EnableWebSecurity

 public class ResourceServerConfig {


 @Bean

 SecurityFilterChain securityFilterChain(HttpSecurity http) throws Exception {

 http.mvcMatcher("/articles/**")

 .authorizeRequests()

 .mvcMatchers("/articles/**").access("hasAuthority('SCOPE_article.read')")

 .and()

 .oauth2ResourceServer()

 .jwt();

 return http.build();

 }

}如此處所示,我們還調用了oauth2ResourceServer()方法,該方法將基於application.yml配置來配置OAuth服務器連接。
3.3 Articles Controller
最後,我們將創建一個REST控制器,該控制器將返回GET /articles端點下的文章列表:
@RestController

 public class ArticlesController {


 @GetMapping("/articles")

 public String[] getArticles() {

 return new String[] { "Article 1", "Article 2", "Article 3" };

 }

 }
4. API客戶端
對於最後一部分,我們將創建一個REST API客戶端,該客戶端將從資源服務器中獲取文章列表。
4.1 依賴關係
首先,讓我們包括所需的依賴項:
<dependency>

 <groupId>org.springframework.boot</groupId>

 <artifactId>spring-boot-starter-web</artifactId>

 <version>2.4.3</version>

 </dependency>

 <dependency>

 <groupId>org.springframework.boot</groupId>

 <artifactId>spring-boot-starter-security</artifactId>

 <version>2.4.3</version>

 </dependency>

 <dependency>

 <groupId>org.springframework.boot</groupId>

 <artifactId>spring-boot-starter-oauth2-client</artifactId>

 <version>2.4.3</version>

 </dependency>

 <dependency>

 <groupId>org.springframework</groupId>

 <artifactId>spring-webflux</artifactId>

 <version>5.3.4</version>

 </dependency>

 <dependency>

 <groupId>io.projectreactor.netty</groupId>

 <artifactId>reactor-netty</artifactId>

 <version>1.0.4</version>

 </dependency>
4.2 配置
正如我們之前所做的,我們將定義一些配置屬性以用於身份驗證:
server:

 port: 8080


 spring:

 security:

 oauth2:

 client:

 registration:

 articles-client-oidc:

 provider: spring

 client-id: articles-client

 client-secret: secret

 authorization-grant-type: authorization_code

 redirect-uri: "{baseUrl}/login/oauth2/code/{registrationId}"

 scope: openid

 client-name: articles-client-oidc

 articles-client-authorization-code:

 provider: spring

 client-id: articles-client

 client-secret: secret

 authorization-grant-type: authorization_code

 redirect-uri: "{baseUrl}/authorized"

 scope: articles.read

 client-name: articles-client-authorization-code

 provider:

 spring:

issuer-uri: http://127.0.0.1:9000現在,讓我們創建一個WebClient實例以執行對資源服務器的HTTP請求。我們將僅使用OAuth授權過濾器的一種附加的標準實現:
@Bean

 WebClient webClient(OAuth2AuthorizedClientManager authorizedClientManager) {

 ServletOAuth2AuthorizedClientExchangeFilterFunction oauth2Client =

 new ServletOAuth2AuthorizedClientExchangeFilterFunction(authorizedClientManager);

 return WebClient.builder()

 .apply(oauth2Client.oauth2Configuration())

 .build();

}WebClient需要OAuth2AuthorizedClientManager作為依賴項。讓我們創建一個默認實現:
@Bean

 OAuth2AuthorizedClientManager authorizedClientManager(

 ClientRegistrationRepository clientRegistrationRepository,

 OAuth2AuthorizedClientRepository authorizedClientRepository) {


 OAuth2AuthorizedClientProvider authorizedClientProvider =

 OAuth2AuthorizedClientProviderBuilder.builder()

 .authorizationCode()

 .refreshToken()

 .build();

 DefaultOAuth2AuthorizedClientManager authorizedClientManager = new DefaultOAuth2AuthorizedClientManager(

 clientRegistrationRepository, authorizedClientRepository);

 authorizedClientManager.setAuthorizedClientProvider(authorizedClientProvider);


 return authorizedClientManager;

 }
最後,我們將配置網絡安全性:
@EnableWebSecurity

 public class SecurityConfig {


 @Bean

 SecurityFilterChain securityFilterChain(HttpSecurity http) throws Exception {

 http

 .authorizeRequests(authorizeRequests ->

 authorizeRequests.anyRequest().authenticated()

 )

 .oauth2Login(oauth2Login ->

 oauth2Login.loginPage("/oauth2/authorization/articles-client-oidc"))

 .oauth2Client(withDefaults());

 return http.build();

 }

}在這裡,以及在其他服務器中,我們將需要對每個請求進行身份驗證。另外,我們需要配置登錄頁面URL(在.yml config中定義)和OAuth客戶端。
4.3 Articles Client Controller
最後,我們可以創建數據訪問控制器。我們將使用先前配置的WebClient將HTTP請求發送到資源服務器:
@RestController

 public class ArticlesController {


 private WebClient webClient;


 @GetMapping(value = "/articles")

 public String[] getArticles(

 @RegisteredOAuth2AuthorizedClient("articles-client-authorization-code") OAuth2AuthorizedClient authorizedClient

 ) {

 return this.webClient

 .get()

 .uri("http://localhost:8090/articles")

 .attributes(oauth2AuthorizedClient(authorizedClient))

 .retrieve()

 .bodyToMono(String[].class)

 .block();

 }

}OAuth2AuthorizedClient類的形式從請求中獲取OAuth授權令牌。它由Spring使用@RegisterdOAuth2AuthorizedClient批註(帶有正確的標識)自動綁定。在我們的例子中,它是從我們先前在.yml文件中article-client-authorizaiton-code .yml
該授權令牌進一步傳遞到HTTP請求。
4.4 訪問文章列表
現在,當我們進入瀏覽器並嘗試訪問http://localhost:8080/articles頁面時,我們將自動重定向到http://127.0.0.1:900/login URL下的OAuth服務器登錄頁面:
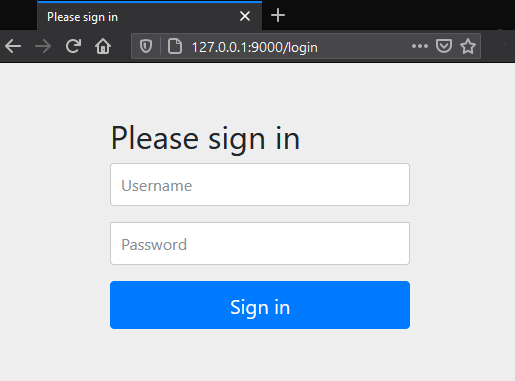
提供正確的用戶名和密碼後,授權服務器會將我們重定向到所請求的URL(文章列表)。
由於訪問令牌將存儲在cookie中,因此對文章端點的其他請求將不需要登錄。
5.結論
在本文中,我們學習瞭如何設置,配置和使用Spring Security OAuth授權服務器。