JSFJSF用戶界面組件模型
JSF UI組件示例
JSF <h:inputText>標籤
JSF <h:outputText>標籤
JSF <h:form>標籤
JSF <h:commandButton>標籤
JSF <h:inputtextarea>標籤
JSF <h:commandLink>標籤
JSF <h:inputSecret>標籤
JSF <h:inputHidden>標籤
JSF <h:inputFile>標籤
JSF <h:graphicImage>標籤
JSF <h:message>標籤
JSF <f:ajax>標籤
JSF單選按鈕
JSF表單組合框
JSF列表框
JSF多選列表框
JSF輸出格式化
JSF輸出樣式
JSF <h:attribute>標籤
JSF <h:setPropertyActionListener>標籤
JSF Facelets視圖
Facelets視圖是XHTML頁面。 您可以通過向頁面添加組件來創建網頁或視圖,將組件連接到後端bean的值和屬性,並在組件上註冊轉換器,驗證器或偵聽器。
XHTML網頁作爲前端。 您的應用程序的第一頁默認爲index.xhtml。
網頁(如,在index.xhtml中)的第一部分聲明頁面的內容類型,即XHTML:
<!DOCTYPE html PUBLIC "-//W3C//DTD XHTML 1.0 Transitional//EN"  "http://www.w3.org/TR/xhtml1/DTD/xhtml1-transitional.dtd">
``

在下一段中指定`XHTML`頁面的語言,然後聲明網頁中使用的標籤庫的XML命名空間。

```html
<html lang="en"
xmlns="http://www.w3.org/1999/xhtml"
xmlns:h="http://xmlns.jcp.org/jsf/html"
xmlns:f="http://xmlns.jcp.org/jsf/core">一個完整的文件:index.xhtml 代碼內容如下所示 -
<?xml version='1.0' encoding='UTF-8' ?>
<!DOCTYPE html PUBLIC "-//W3C//DTD XHTML 1.0 Transitional//EN""http://www.w3.org/TR/xhtml1/DTD/xhtml1-transitional.dtd">
<html xmlns="http://www.w3.org/1999/xhtml"
xmlns:h="http://xmlns.jcp.org/jsf/html"
xmlns:f="http://xmlns.jcp.org/jsf/core">
<h:head>
    <title>Jsf Form</title>
</h:head>
    <h:body>
        <h:form id="form">
        <h:outputLabel for="username">User Name</h:outputLabel>
        <h:inputText id="name" value="#{user.name}" required="true">
        <f:validateRequired for="name" />
        </h:inputText><br/>
        <h:commandButton value="OK" action="response.xhtml"></h:commandButton>
        </h:form>
    </h:body>
</html>
Facelets HTML標籤以h:開頭,用於在網頁和核心標籤上添加組件f:validateRequired用於驗證用戶輸入。
h:inputText標籤接受用戶輸入,並通過EL表達式#{user.name}設置託管bean屬性名稱的值。
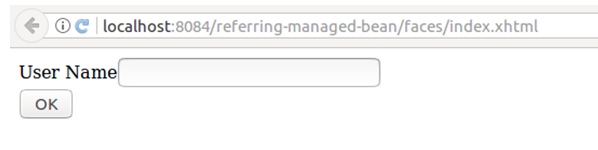
運行index.xhtml文件後,JSF將呈現一個HTML索引頁面。輸出如下所示 -
這是創建Facelets視圖的過程。現在,您可以創建第二個xhtml頁面:response.xhtml 其中的代碼內容如下 -
<?xml version='1.0' encoding='UTF-8' ?>
<!DOCTYPE html PUBLIC "-//W3C//DTD XHTML 1.0 Transitional//EN""http://www.w3.org/TR/xhtml1/DTD/xhtml1-transitional.dtd">
<html xmlns="http://www.w3.org/1999/xhtml"
xmlns:h="http://xmlns.jcp.org/jsf/html">
<h:head>
<title>Response Page</title>
</h:head>
<h:body>
<h1>
Hello #{user.name}
</h1>
</h:body>
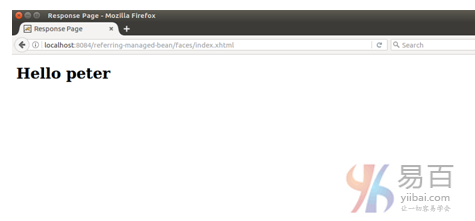
</html>運行 index.xhtml 文件後,將顯示以下輸出。
在輸入框中寫入一個名字,提交得到如下結果 -
映射Faces Servlet
通過將Web部署描述符文件中的Faces Servlet映射到web.xml文件中來完成JavaServer Faces應用程序的配置。
在NetBeans IDE中,會自動爲您創建一個Web部署描述符文件。下面給出了一個自動生成的web.xml文件的內容。
<?xml version="1.0" encoding="UTF-8"?>
<web-app version="3.1" xmlns="http://xmlns.jcp.org/xml/ns/javaee" xmlns:xsi="http://www.w3.org/2001/XMLSchema-instance" xsi:schemaLocation="http://xmlns.jcp.org/xml/ns/javaee http://xmlns.jcp.org/xml/ns/javaee/web-app_3_1.xsd">
<context-param>
<param-name>javax.faces.PROJECT_STAGE</param-name>
<param-value>Development</param-value>
</context-param>
<servlet>
<servlet-name>Faces Servlet</servlet-name>
<servlet-class>javax.faces.webapp.FacesServlet</servlet-class>
<load-on-startup>1</load-on-startup>
</servlet>
<servlet-mapping>
<servlet-name>Faces Servlet</servlet-name>
<url-pattern>/faces/*</url-pattern>
</servlet-mapping>
<session-config>
<session-timeout>
30
</session-timeout>
</session-config>
<welcome-file-list>
<welcome-file>faces/index.xhtml</welcome-file>
</welcome-file-list>
</web-app>