使用Spring Boot和Swagger UI設置JWT
瀏覽人數:2,272最近更新:
1.簡介
在這個簡短的教程中,我們將了解如何在調用我們的API時將Swagger UI配置為包括JSON Web令牌(JWT)。
2. Maven依賴
在此示例中,我們將使用springfox-boot-starter ,其中包括開始使用Swagger和Swagger UI所需的所有必需依賴項。讓我們將其添加到我們的pom.xml文件中:
<dependency>

 <groupId>org.springframework.boot</groupId>

 <artifactId>spring-boot-starter-web</artifactId>

 </dependency>

 <dependency>

 <groupId>io.springfox</groupId>

 <artifactId>springfox-boot-starter</artifactId>

 <version>3.0.0</version>

 </dependency>
3. Swagger配置
首先,我們需要定義ApiKey以將JWT作為授權標頭包括在內:
private ApiKey apiKey() {

 return new ApiKey("JWT", "Authorization", "header");

}接下來,讓我們使用全局AuthorizationScope配置JWT SecurityContext :
private SecurityContext securityContext() {

 return SecurityContext.builder().securityReferences(defaultAuth()).build();

 }


 private List<SecurityReference> defaultAuth() {

 AuthorizationScope authorizationScope = new AuthorizationScope("global", "accessEverything");

 AuthorizationScope[] authorizationScopes = new AuthorizationScope[1];

 authorizationScopes[0] = authorizationScope;

 return Arrays.asList(new SecurityReference("JWT", authorizationScopes));

 }
然後,我們將API Docket bean配置為包括API信息,安全性上下文和安全性方案:
@Bean

 public Docket api() {

 return new Docket(DocumentationType.SWAGGER_2)

 .apiInfo(apiInfo())

 .securityContexts(Arrays.asList(securityContext()))

 .securitySchemes(Arrays.asList(apiKey()))

 .select()

 .apis(RequestHandlerSelectors.any())

 .paths(PathSelectors.any())

 .build();

 }
private ApiInfo apiInfo() {

 return new ApiInfo(

 "My REST API",

 "Some custom description of API.",

 "1.0",

 "Terms of service",

 new Contact("Sallo Szrajbman", "www.baeldung.com", "[email protected]"),

 "License of API",

 "API license URL",

 Collections.emptyList());

 }
4. REST控制器
在我們的ClientsRestController ,讓我們編寫一個簡單的getClients端點以返回客戶端列表:
@RestController(value = "/clients")

 @Api( tags = "Clients")

 public class ClientsRestController {


 @ApiOperation(value = "This method is used to get the clients.")

 @GetMapping

 public List<String> getClients() {

 return Arrays.asList("First Client", "Second Client");

 }

 }
5. Swagger UI
現在,當我們啟動應用程序時,我們可以通過http://localhost:8080/swagger-ui/ URL訪問Swagger UI。
這是帶Authorize按鈕的Swagger UI的外觀:
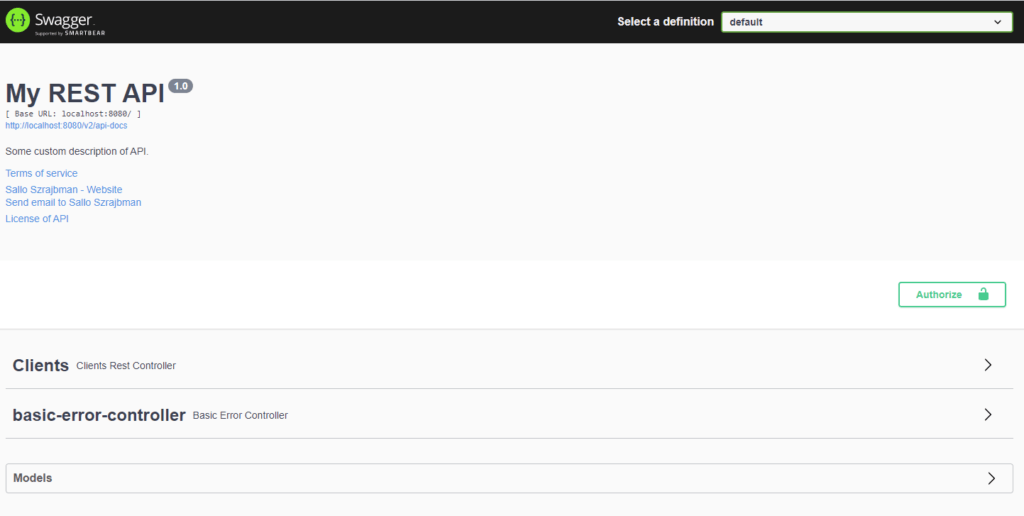
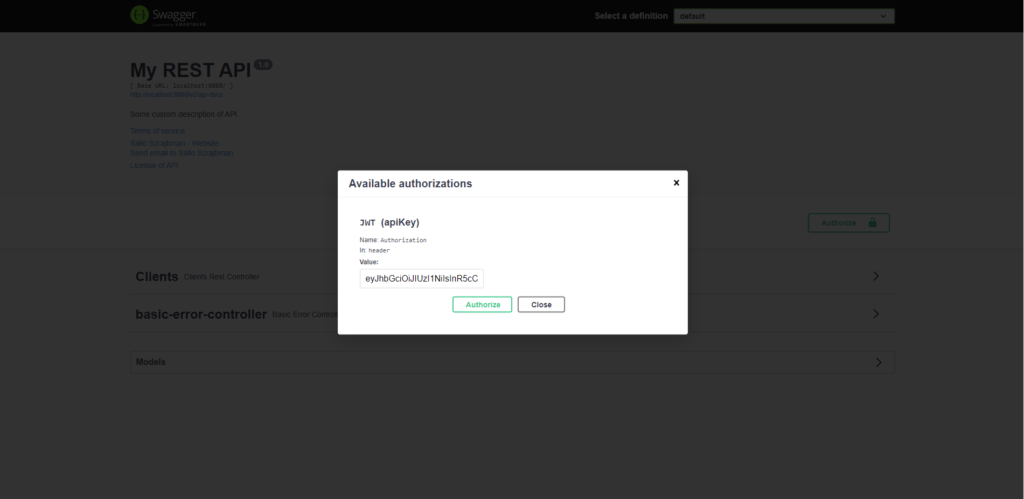
當我們單擊“ Authorize按鈕時,Swagger UI將要求提供JWT。
我們只需要輸入令牌並單擊Authorize ,然後,對我們API的所有請求將自動在HTTP標頭中包含令牌:
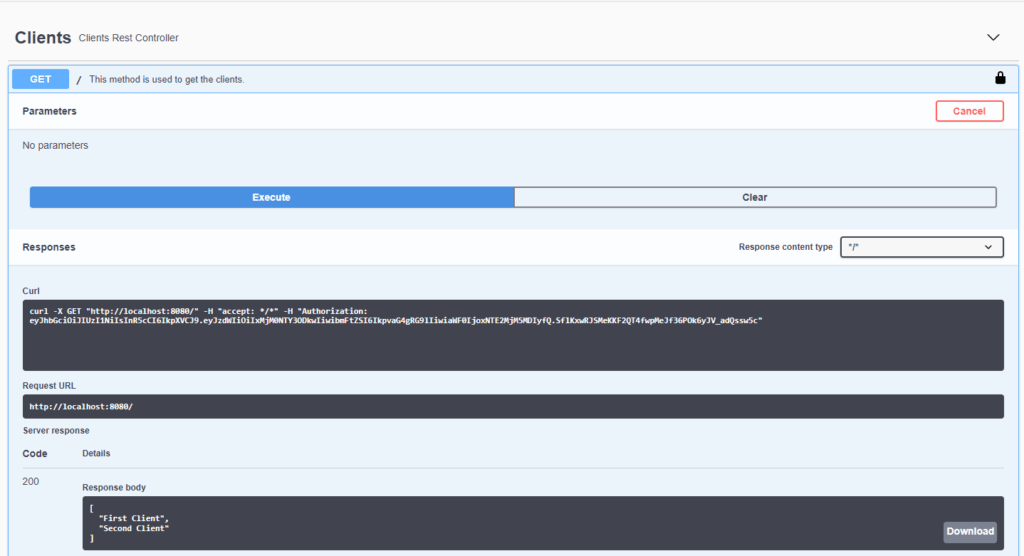
6. JWT的API請求
將請求發送到我們的API時,我們可以看到其中包含帶有令牌值的“ Authorization”標頭:
7.結論
在本文中,我們了解了Swagger UI如何提供自定義配置來設置JWT,這在處理我們的應用程序授權時可能會有所幫助。在Swagger UI中授權後,所有請求將自動包含我們的JWT。
本作品係原創或者翻譯,採用《署名-非商業性使用-禁止演繹4.0國際》許可協議