Spring Boot 3 – 設定 Spring Security 以允許 Swagger UI
1. 概述
在本教程中,我們將學習如何設定 Spring Security 以允許在 Spring Boot 3 應用程式中存取 Swagger UI。
Swagger UI 是用來記錄 API 的工具。它提供了一個用戶友好的介面來與 API 和測試端點進行互動。但是,當我們在應用程式中啟用 Spring Security 時,由於安全限制,Swagger UI 將變得無法存取。
我們將探討如何在 Spring Boot 3 應用程式中設定 Swagger 並設定 Spring Security 以允許存取 Swagger UI。
2. 代碼設定
讓我們從設定我們的應用程式開始。我們將添加必要的依賴項並建立一個簡單的控制器。我們將配置 Swagger 並測試 Swagger UI 是否無法存取。然後我們將透過配置 Spring Security 來修復它。
2.1.新增 Swagger 和 Spring Security 依賴項
首先,我們將必要的依賴項新增到pom.xml檔案中:
`
springdoc-openapi-starter-webmvc-ui是一個封裝了 Swagger 的 Springdoc OpenAPI 函式庫。它包含在應用程式中設定 Swagger 所需的依賴項和註釋。
spring-boot-starter-security依賴項為應用程式提供 Spring Security。當我們新增此依賴項時,Spring Security 預設會啟用並阻止對所有 URL 的存取。
建立 API 需要[spring-boot-starter-web](https://mvnrepository.com/artifact/org.springframework.boot/spring-boot-starter-web)依賴項。
2.2.控制器
接下來,讓我們建立一個具有端點的控制器:
`@RestController
public class HelloController {
@GetMapping("/hello")
public String hello() {
return "Hello, World!";
}
}`
當我們呼叫hello端點時,它會傳回字串“Hello, World!”.
3.配置Swagger
接下來,讓我們來配置 Swagger。我們將設定配置以啟用 Swagger 並向控制器添加註釋。
3.1.配置類別
為了配置Swagger,我們需要建立一個配置類別:
`@Configuration
public class SwaggerConfig {
@Bean
public GroupedOpenApi publicApi() {
return GroupedOpenApi.builder()
.group("public")
.pathsToMatch("/**")
.build();
}
}`
在這裡,我們建立了一個SwaggerConfig類別並定義了一個傳回GroupedOpenApi bean 的publicApi()方法。該 bean 會對與指定路徑模式相符的所有端點進行分組。
我們在方法中定義了一個public群組,並將路徑模式指定為「 /**” 。這意味著應用程式中的所有端點都將包含在該群組中。
3.2. Swagger 註釋
接下來,我們為控制器添加 Swagger 註解:
`@Operation(summary = "Returns a Hello World message")
@GetMapping("/hello")
public String hello() {
return "Hello, World!";
}`
我們在hello()方法中加入了@Operation註解來描述端點。此描述將顯示在 Swagger UI 中。
3.3.測試
現在,讓我們運行應用程式並測試 Swagger UI。預設情況下,Swagger UI 應該可以透過[http://localhost:8080/swagger-ui/index.html](http://localhost:8080/swagger-ui/index.html)存取:

在上圖中,我們可以看到 Swagger UI 無法存取。相反,系統會提示我們輸入使用者名稱和密碼。 Spring Security 希望在允許存取 URL 之前對使用者進行身份驗證。
4. 設定 Spring Security 以允許 Swagger UI
現在,讓我們配置 Spring Security 以允許存取 Swagger UI。我們將研究兩種實現此目的的方法:使用SecurityFilterChain和WebSecurityCustomizer 。
4.1.使用WebSecurityCustomizer
從 Spring Security 中排除路徑的簡單方法是使用WebSecurityCustomizer介面。我們可以使用此介面在指定的 URL 上停用 Spring Security。
讓我們在設定類別中定義一個WebSecurityCustomizer類型的 bean:
`@Configuration
public class SecurityConfig {
@Bean
public WebSecurityCustomizer webSecurityCustomizer() {
return (web) -> web.ignoring()
.requestMatchers("/swagger-ui/", "/v3/api-docs/");
}
}`
@Configuration註解將該類別標記為設定類別。接下來,我們定義一個WebSecurityCustomizer.
在這裡,我們使用 lambda 表達式來定義WebSecurityCustomizer實作。我們使用ignoring()方法從安全性配置中排除 Swagger UI URL /swagger-ui/**和/v3/api-docs/** 。
當我們想要忽略 URL 上的所有安全規則時,這非常有用。僅當 URL 是內部且不公開時才建議這樣做,因為沒有安全規則適用於它。
4.2.使用SecurityFilterChain
覆寫 Spring Security 預設實作的另一種方法是定義SecurityFilterChain bean。然後我們可以在我們提供的實作中允許 Swagger URL。
為此,我們可以定義一個SecurityFilterChain bean:
@Bean

 public SecurityFilterChain filterChain(HttpSecurity http) throws Exception {

 http.authorizeHttpRequests(

 authorizeRequests -> authorizeRequests.requestMatchers("/swagger-ui/**")

 .permitAll()

 .requestMatchers("/v3/api-docs/**")

 .permitAll());


 return http.build();

 }
此方法配置安全過濾器鏈以允許存取 Swagger UI URL:
- 我們使用了
authorizeHttpRequests()方法來定義授權規則。 -
requestMatchers()方法用於匹配 URL。我們指定了 Swagger UI URL 模式/swagger-ui/**和/v3/api-docs/**。 -
/swagger-ui/**是 Swagger UI 的 URL 模式,而/v3/api-docs/**是 Swagger 呼叫以取得 API 資訊的 OpenAPI 文件的 URL 模式。 - 我們使用
permitAll()方法來允許無需身份驗證即可存取這些 URL。 - 最後,我們回傳了
http.build()方法來建立安全過濾器鏈。
這是允許對某些 URL 模式進行未經身份驗證的請求的建議方法。這些 URL 將在回應中包含 Spring Security 標頭。但是,他們不需要用戶身份驗證。
4.3.測試
現在,讓我們運行應用程式並再次測試 Swagger UI。 Swagger UI 現在應該可以存取。
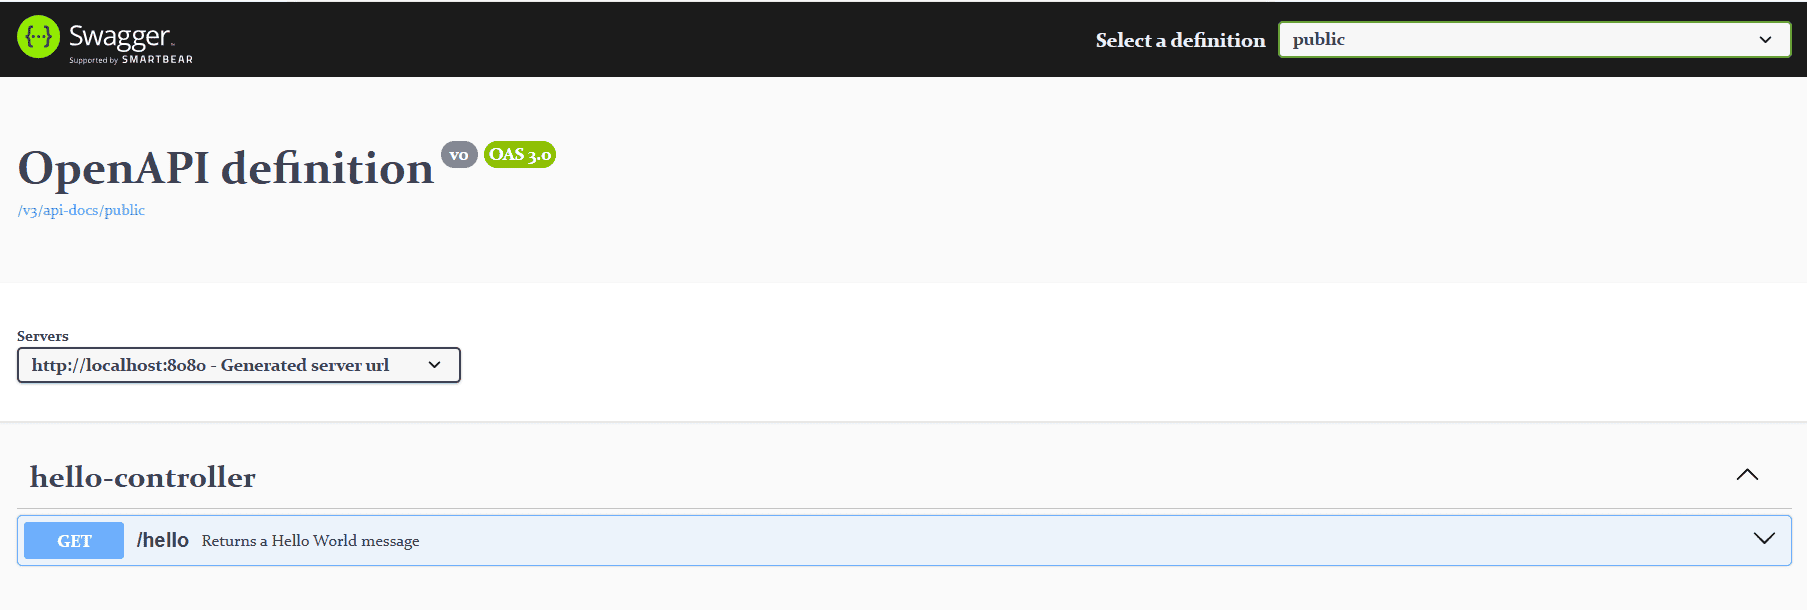 正如我們所看到的,該頁面是可存取的並且包含有關我們的控制器端點的資訊。
5. 結論
在本文中,我們學習如何設定 Spring Security 以允許存取 Spring Boot 3 應用程式中的 Swagger UI。我們探索如何使用SecurityFilterChain和WebSecurityCustomizer介面從 Spring Security 設定中排除 Swagger UI URL。
與往常一樣,本教學的程式碼可在 GitHub 上取得。