Spring Security入門程序示例
在本教程中,我們將向您展示如何通過Spring Security使用Spring MVC的Web應用程序來集成一個URL訪問。使用 Spring Security 來實現一個「admin」頁面的內容後,驗證用戶輸入正確的「用戶名」和「密碼」。
使用到的技術包括:
- Spring 3.2.8.RELEASE
- Spring Security 3.2.3.RELEASE
- Eclipse 4.2
- JDK 1.6
- Maven 3
注意:
Spring Security 3.0 需要 Java5.0 或更高版本的運行環境,由於在這一系列教程中使用的是Maven來創建工程,如果不瞭解 Mave 如何使用的,可以參考:http://www.yiibai.com/maven/create-a-maven-web-project-with-eclipse.html
1. 目錄結構
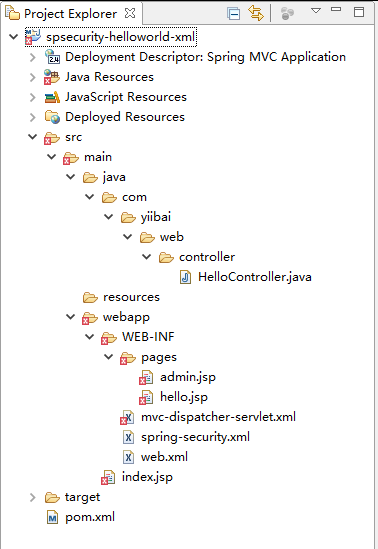
下面先來看看本教程的最終目錄結構,如下圖所示 -
2. Spring Security依懶
要使用 Spring security 你需要 spring-security-web 和 spring-security-config.
pom.xml
<dependencies>

    <!-- Spring dependencies -->
    <dependency>
        <groupId>org.springframework</groupId>
        <artifactId>spring-core</artifactId>
        <version>${spring.version}</version>
    </dependency>

    <dependency>
        <groupId>org.springframework</groupId>
        <artifactId>spring-web</artifactId>
        <version>${spring.version}</version>
    </dependency>

    <dependency>
        <groupId>org.springframework</groupId>
        <artifactId>spring-webmvc</artifactId>
        <version>${spring.version}</version>
    </dependency>

    <!-- Spring Security -->
    <dependency>
        <groupId>org.springframework.security</groupId>
        <artifactId>spring-security-web</artifactId>
        <version>${spring.security.version}</version>
    </dependency>

    <dependency>
        <groupId>org.springframework.security</groupId>
        <artifactId>spring-security-config</artifactId>
        <version>${spring.security.version}</version>
    </dependency>

    <!-- jstl for jsp page -->
    <dependency>
        <groupId>jstl</groupId>
        <artifactId>jstl</artifactId>
        <version>${jstl.version}</version>
    </dependency>

</dependencies>
4. Spring MVC Web應用程序
一個簡單的控制器:
- 如果URL = /welcome 或 / , 返回 hello 頁面;
- 如果 URL = /admin , 返回 admin 頁面;
稍後,我們將學習如何使用Spring Security 實現 「/admin」 網址頁面顯示用戶登錄表單。
HelloController.java
package com.yiibai.web.controller;
import org.springframework.stereotype.Controller;
import org.springframework.web.bind.annotation.RequestMapping;
import org.springframework.web.bind.annotation.RequestMethod;
import org.springframework.web.servlet.ModelAndView;
@Controller
public class HelloController {
@RequestMapping(value = { "/", "/welcome\*\*" }, method = RequestMethod.GET)
public ModelAndView welcomePage() {

    ModelAndView model = new ModelAndView();
    model.addObject("title", "Spring Security Hello World");
    model.addObject("message", "This is welcome page!");
    model.setViewName("hello");
    return model;

}

@RequestMapping(value = "/admin\*\*", method = RequestMethod.GET)
public ModelAndView adminPage() {

    ModelAndView model = new ModelAndView();
    model.addObject("title", "Spring Security Hello World");
    model.addObject("message", "This is protected page!");
    model.setViewName("admin");

    return model;

}
}
需要用到兩個JSP 頁面,如下所示 -
hello.jsp
<%@page session="false"%>
標題: ${title}
消息 : ${message}
admin.jsp
<%@taglib prefix="c" uri="http://java.sun.com/jsp/jstl/core"%>
<%@page session="true"%>
標題: ${title}
消息 : ${message}
<c:if test="${pageContext.request.userPrincipal.name != null}">
   <h2>歡迎: ${pageContext.request.userPrincipal.name}
       | <a href="<c:url value="/j\_spring\_security\_logout" />" > Logout</a></h2>
</c:if>
mvc-dispatcher-servlet.xml
<context:component-scan base-package="com.yiibai.\*" />

<bean
  class="org.springframework.web.servlet.view.InternalResourceViewResolver">
  <property name="prefix">
    <value>/WEB-INF/pages/</value>
  </property>
  <property name="suffix">
    <value>.jsp</value>
  </property>
</bean>
5. Spring Security : 用戶身份驗證
創建一個 Spring Security XML文件,如下所示 -
spring-security.xml
<beans:beans xmlns="http://www.springframework.org/schema/security"
xmlns:beans="http://www.springframework.org/schema/beans"
xmlns:xsi="http://www.w3.org/2001/XMLSchema-instance"
xsi:schemaLocation="http://www.springframework.org/schema/beans
http://www.springframework.org/schema/beans/spring-beans-3.0.xsd
http://www.springframework.org/schema/security
http://www.springframework.org/schema/security/spring-security-3.2.xsd">
<http auto-config="true">
    <intercept-url pattern="/admin\*\*" access="ROLE\_USER" />
</http>

<authentication-manager>
  <authentication-provider>
    <user-service>
    <user name="yiibai" password="123456" authorities="ROLE\_USER" />
    </user-service>
  </authentication-provider>
</authentication-manager>
這裏要說明的是:只有用戶「yiibai」才能允許訪問URL:/admin 。
6. 集成Spring Security
通過Spring Security使用Spring MVC Web應用程序集成,只是聲明 DelegatingFilterProxy 作爲一個Servlet過濾器來攔截任何傳入的請求。
web.xml
<display-name>Spring MVC Application</display-name>

<!-- Spring MVC -->
<servlet>
    <servlet-name>mvc-dispatcher</servlet-name>
    <servlet-class>org.springframework.web.servlet.DispatcherServlet
    </servlet-class>
    <load-on-startup>1</load-on-startup>
</servlet>
<servlet-mapping>
    <servlet-name>mvc-dispatcher</servlet-name>
    <url-pattern>/</url-pattern>
</servlet-mapping>

<listener>
    <listener-class>org.springframework.web.context.ContextLoaderListener
    </listener-class>
</listener>

    <!-- Loads Spring Security config file -->
<context-param>
    <param-name>contextConfigLocation</param-name>
    <param-value>
        /WEB-INF/spring-security.xml
    </param-value>
</context-param>

<!-- Spring Security -->
<filter>
    <filter-name>springSecurityFilterChain</filter-name>
    <filter-class>org.springframework.web.filter.DelegatingFilterProxy
    </filter-class>
</filter>

<filter-mapping>
    <filter-name>springSecurityFilterChain</filter-name>
    <url-pattern>/\*</url-pattern>
</filter-mapping>
7. 示例
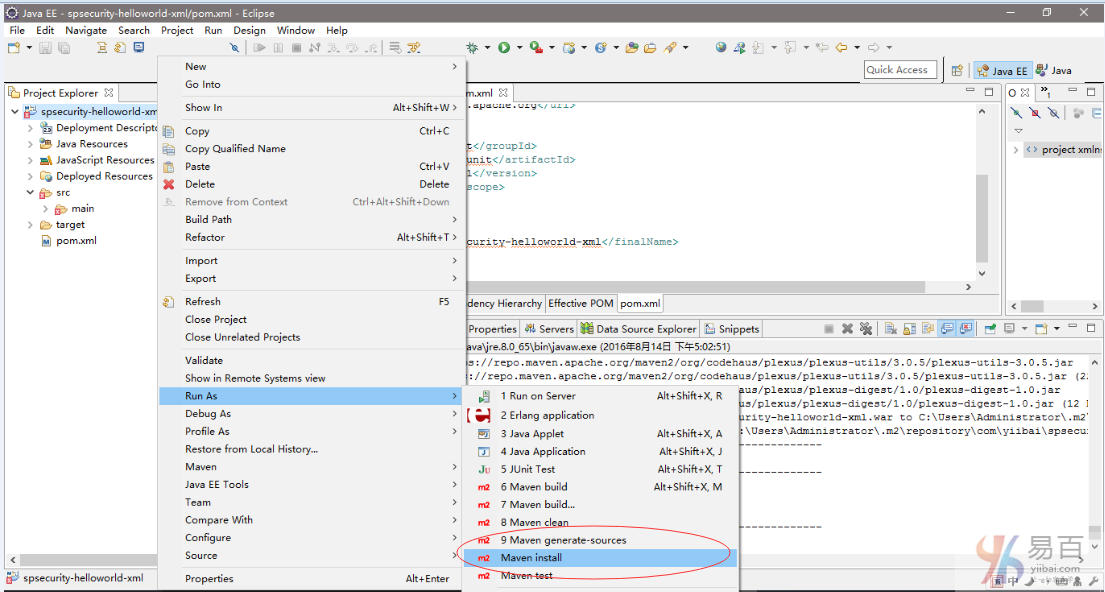
首先要創建一個 Maven 的 j2ee 工程,然後編寫代碼完成後,再發布 Maven 工程。按照如下操作,在工程名稱:spsecurity-helloworld-xml 上右鍵,選擇 Run As -> Maven install 如下圖中所示:
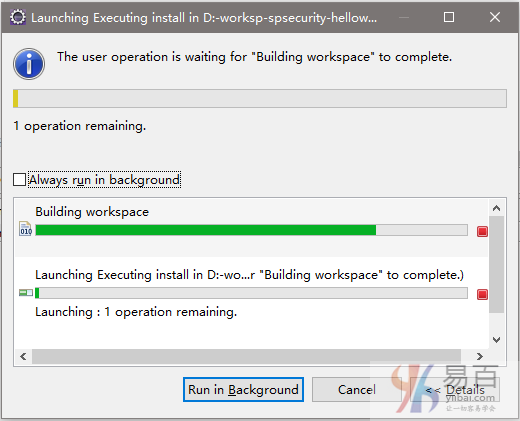
Eclipse 開始下載相關聯的依懶包,如下圖中所示 -
全部就這些,但是等等...登錄表單哪來?不用擔心,如果不定製定義登錄表單,Spring會自動創建一個簡單的登錄表單。
定義登錄表單
請閱讀 「Spring Security登錄實例」 以瞭解如何創建Spring Security中的自定義登錄表單。
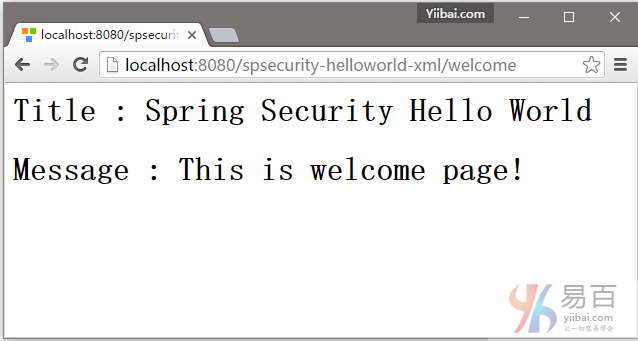
1. 歡迎頁面 – http://localhost:8080/spsecurity-helloworld-xml/welcome
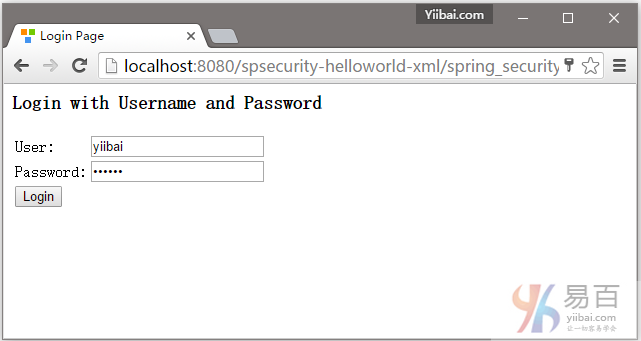
2. 現在嘗試訪問 http://localhost:8080/spsecurity-helloworld-xml/admin 頁面,Spring Security將攔截請求並重定向到 /spring_security_login,並顯示一個預定義的登錄表單。
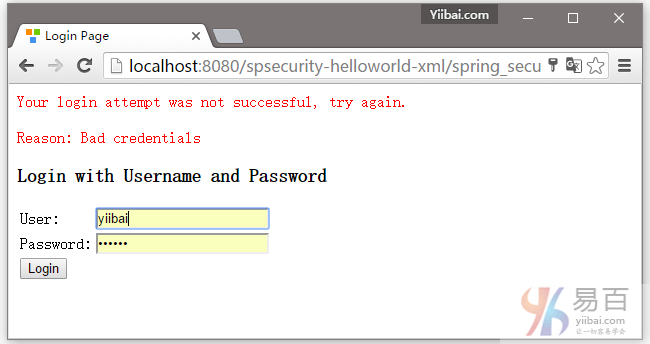
3. 如果用戶名和密碼不正確,那麼將會顯示錯誤信息,並且 Spring 將重定向到以下網址:/spring_security_login?login_error.
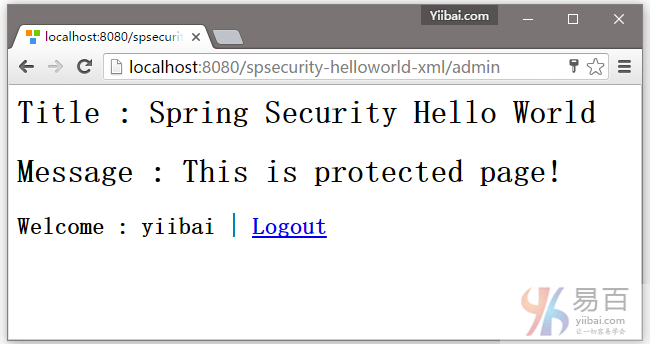
4.如果用戶名和密碼都正確,Spring將請求重定向到原來請求的URL並顯示該網頁內容。
下載源代碼
請點擊以下鏈接下載示例代碼 – spsecurity-helloworld-xml.zip (9 KB)
參考
- Spring Security官方網站
- Spring 3 MVC hello world實例
- Spring Security登錄實例(身份驗證)