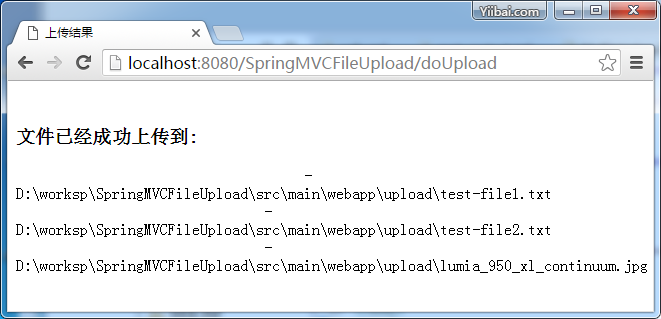
Spring MVC文件上傳教學
1- 介紹
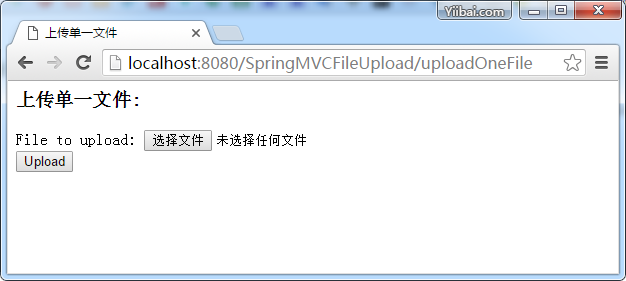
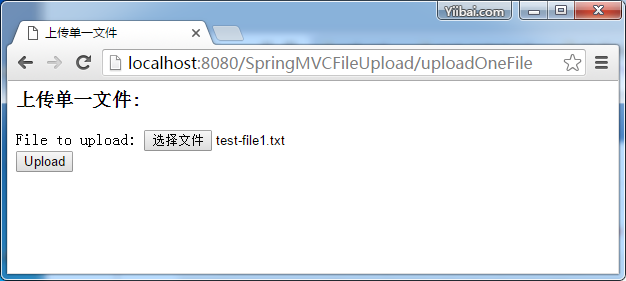
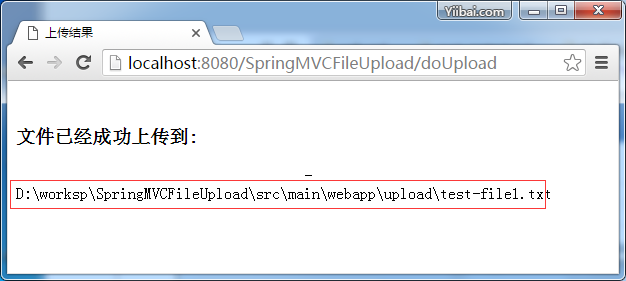
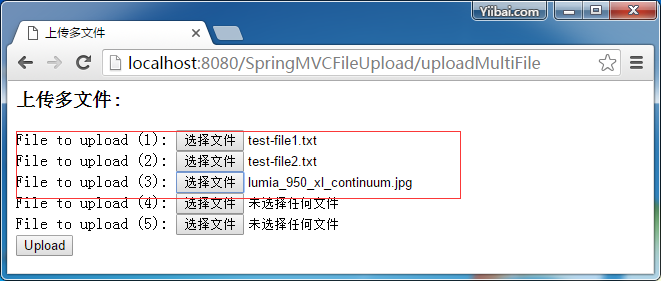
這篇教程文章是基於 Spring MVC來實現文件的上傳功能,這裏主要是實現兩個功能:1、上傳單個文件並將其移動到對應的上傳目錄;2、一次上傳多個文件並將它們存儲在指定文件夾下,接下來我們一步步地實現。
2- 創建工程
- File/New/Other..
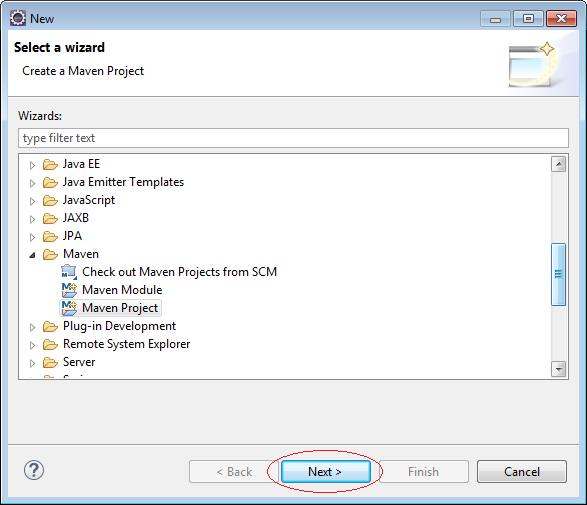
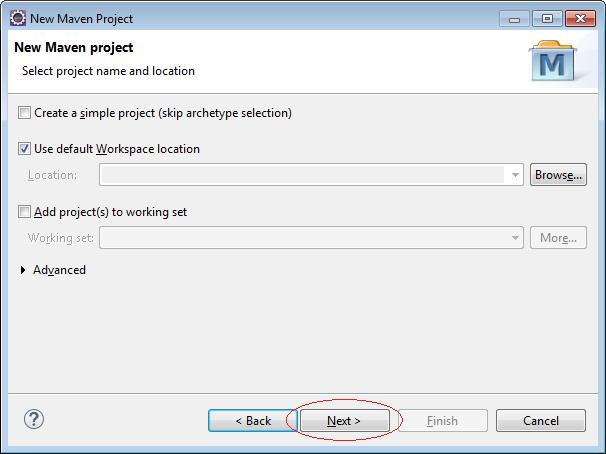
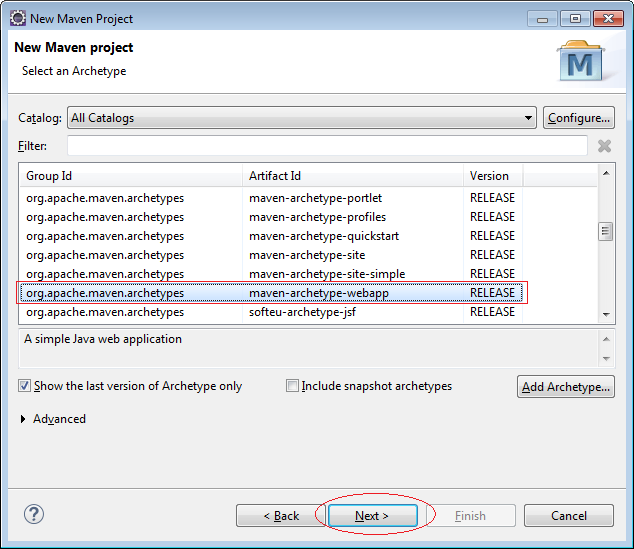
輸入:
- Group ID: com.yiibai
- Artifact ID: SpringMVCFileUpload
- Package: com.yiibai.springmvcfileupload
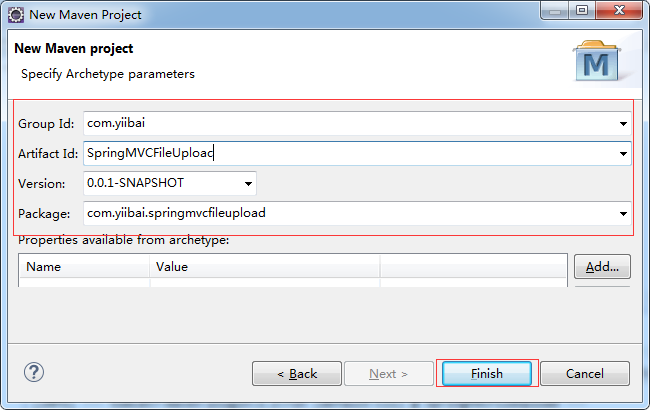
這樣,工程就被創建了,如下圖所示:
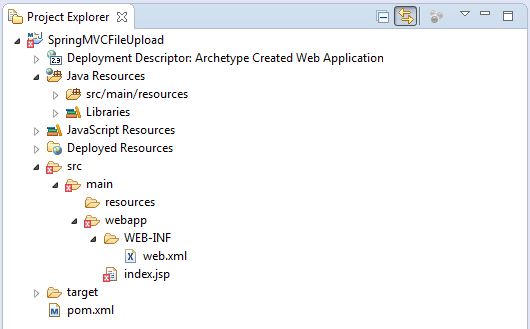
不要擔心項目被創建時有錯誤消息。原因是,你還沒有聲明的Servlet庫。
注意:
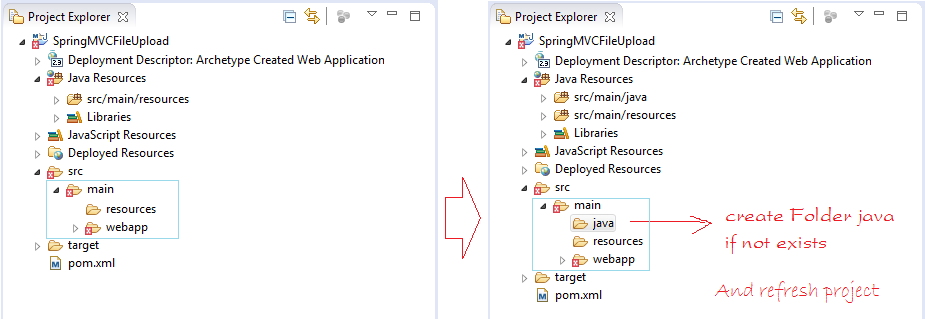
Eclipse 4.4 (Luna) 創建 Maven 項目結構可能會有錯誤,需要修復它。
3- 配置Maven
- pom.xml
<modelVersion>4.0.0</modelVersion>
<groupId>com.yiibai</groupId>
<artifactId>SpringMVCFileUpload</artifactId>
<packaging>war</packaging>
<version>0.0.1-SNAPSHOT</version>
<name>SpringMVCFileUpload Maven Webapp</name>
<url>http://maven.apache.org</url>

<dependencies>
    <dependency>
        <groupId>junit</groupId>
        <artifactId>junit</artifactId>
        <version>3.8.1</version>
        <scope>test</scope>
    </dependency>


    <!-- Servlet API -->
    <!-- http://mvnrepository.com/artifact/javax.servlet/javax.servlet-api -->
    <dependency>
        <groupId>javax.servlet</groupId>
        <artifactId>javax.servlet-api</artifactId>
        <version>3.1.0</version>
        <scope>provided</scope>
    </dependency>

    <!-- Jstl for jsp page -->
    <!-- http://mvnrepository.com/artifact/javax.servlet/jstl -->
    <dependency>
        <groupId>javax.servlet</groupId>
        <artifactId>jstl</artifactId>
        <version>1.2</version>
    </dependency>


    <!-- JSP API -->
    <!-- http://mvnrepository.com/artifact/javax.servlet.jsp/jsp-api -->
    <dependency>
        <groupId>javax.servlet.jsp</groupId>
        <artifactId>jsp-api</artifactId>
        <version>2.2</version>
        <scope>provided</scope>
    </dependency>


    <!-- Spring dependencies -->
    <!-- http://mvnrepository.com/artifact/org.springframework/spring-core -->
    <dependency>
        <groupId>org.springframework</groupId>
        <artifactId>spring-core</artifactId>
        <version>4.1.4.RELEASE</version>
    </dependency>

    <!-- http://mvnrepository.com/artifact/org.springframework/spring-web -->
    <dependency>
        <groupId>org.springframework</groupId>
        <artifactId>spring-web</artifactId>
        <version>4.1.4.RELEASE</version>
    </dependency>

    <!-- http://mvnrepository.com/artifact/org.springframework/spring-webmvc -->
    <dependency>
        <groupId>org.springframework</groupId>
        <artifactId>spring-webmvc</artifactId>
        <version>4.1.4.RELEASE</version>
    </dependency>


    <!-- Apache Commons FileUpload -->
    <!-- http://mvnrepository.com/artifact/commons-fileupload/commons-fileupload -->
    <dependency>
        <groupId>commons-fileupload</groupId>
        <artifactId>commons-fileupload</artifactId>
        <version>1.3.1</version>
    </dependency>

    <!-- Apache Commons IO -->
    <!-- http://mvnrepository.com/artifact/commons-io/commons-io -->
    <dependency>
        <groupId>commons-io</groupId>
        <artifactId>commons-io</artifactId>
        <version>2.4</version>
    </dependency>
</dependencies>

<build>
    <finalName>SpringMVCFileUpload</finalName>
    <plugins>

        <!-- Config: Maven Tomcat Plugin -->
        <!-- http://mvnrepository.com/artifact/org.apache.tomcat.maven/tomcat7-maven-plugin -->
        <plugin>
            <groupId>org.apache.tomcat.maven</groupId>
            <artifactId>tomcat7-maven-plugin</artifactId>
            <version>2.2</version>

            <!-- Config: contextPath and Port (Default - /SpringMVCFileUpload : 8080) -->

            <!--
            <configuration>
                <path>/</path>
                <port>8899</port>
            </configuration>
            -->
        </plugin>
    </plugins>
</build>
4- 配置Spring
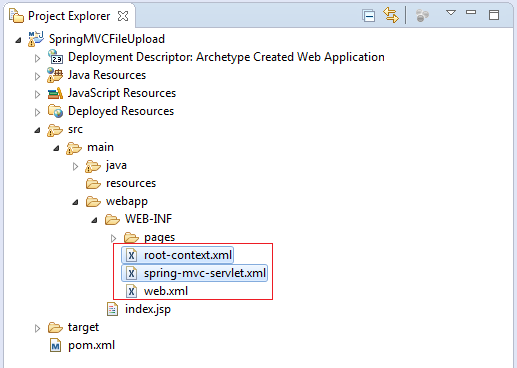
配置 web.xml.
SpringContextListener 將讀取參數 contextConfigLocation 在配置文件:
- WEB-INF/web.xml
org.springframework.web.servlet.DispatcherServlet
配置 Spring MVC:
- WEB-INF/spring-mvc-servlet.xml
<context:component-scan base-package="com.yiibai.springmvcfileupload" />
<context:annotation-config />
   <property name="prefix">
       <value>/WEB-INF/pages/</value>
   </property>

   <property name="suffix">
       <value>.jsp</value>
   </property>
    <!-- Maximum file size: 1MB -->
    <!-- 1MB = 125000 Byte -->
<property name="maxUploadSize" value="125000" />- WEB-INF/root-context.xml
5- Java類
- MyFileUploadController.java
package com.yiibai.springmvcfileupload;
import java.io.BufferedOutputStream;
import java.io.File;
import java.io.FileOutputStream;
import java.util.ArrayList;
import java.util.List;
import javax.servlet.http.HttpServletRequest;
import org.springframework.stereotype.Controller;
import org.springframework.ui.Model;
import org.springframework.web.bind.annotation.RequestMapping;
import org.springframework.web.bind.annotation.RequestMethod;
import org.springframework.web.bind.annotation.RequestParam;
import org.springframework.web.multipart.MultipartFile;
@Controller
public class MyFileUploadController {
// Upload One File.
@RequestMapping(value = "/uploadOneFile")
public String uploadOneFileHandler() {
    // Forward to "/WEB-INF/pages/uploadOneFile.jsp".
    return "uploadOneFile";
}

// Upload Multi File.
@RequestMapping(value = "/uploadMultiFile")
public String uploadMultiFileHandler() {
    // Forward to "/WEB-INF/pages/uploadMultiFile.jsp".
    return "uploadMultiFile";
}

// uploadOneFile.jsp, uploadMultiFile.jsp submit to.
@RequestMapping(value = "/doUpload", method = RequestMethod.POST)
public String uploadFileHandler(HttpServletRequest request, Model model,
        @RequestParam("file") MultipartFile\[\] files) {

    // Root Directory.
    String uploadRootPath = request.getServletContext().getRealPath(
            "upload");
    System.out.println("uploadRootPath=" + uploadRootPath);

    File uploadRootDir = new File(uploadRootPath);
    //
    // Create directory if it not exists.
    if (!uploadRootDir.exists()) {
        uploadRootDir.mkdirs();
    }
    //
    List<File> uploadedFiles = new ArrayList<File>();
    for (int i = 0; i < files.length; i++) {
        MultipartFile file = files\[i\];

        // Client File Name
        String name = file.getOriginalFilename();
        System.out.println("Client File Name = " + name);

        if (name != null && name.length() > 0) {
            try {
                byte\[\] bytes = file.getBytes();

                // Create the file on server
                File serverFile = new File(uploadRootDir.getAbsolutePath()
                        + File.separator + name);

                // Stream to write data to file in server.
                BufferedOutputStream stream = new BufferedOutputStream(
                        new FileOutputStream(serverFile));
                stream.write(bytes);
                stream.close();
                //
                uploadedFiles.add(serverFile);
                System.out.println("Write file: " + serverFile);
            } catch (Exception e) {
                System.out.println("Error Write file: " + name);
            }
        }
    }
    model.addAttribute("uploadedFiles", uploadedFiles);
    return "uploadResult";
}
}
6- 視圖(JSP)
- uploadOneFile.jsp
<%@ page language="java" contentType="text/html; charset=UTF-8"
pageEncoding="UTF-8"%>
<h3>Upload One File:</h3>

<form method="POST" action="doUpload" enctype="multipart/form-data">
    File to upload: <input type="file" name="file"><br />
    <input type="submit" value="Upload">
</form>- uploadMultiFile.jsp
<%@ page language="java" contentType="text/html; charset=UTF-8"
pageEncoding="UTF-8"%>
Upload Multiple File:
<form method="POST" action="doUpload" enctype="multipart/form-data">

    File to upload (1): <input type="file" name="file"><br />
    File to upload (2): <input type="file" name="file"><br />
    File to upload (3): <input type="file" name="file"><br />
    File to upload (4): <input type="file" name="file"><br />
    File to upload (5): <input type="file" name="file"><br />

    <input type="submit" value="Upload">
</form>- uploadResult.jsp
<%@ page language="java" contentType="text/html; charset=UTF-8"
pageEncoding="UTF-8"%>
<%@taglib uri="http://java.sun.com/jsp/jstl/core" prefix="c"%>
Uploaded Files:
<c:forEach items="${uploadedFiles}" var="file">
       - ${file} <br>
</c:forEach>
7- 運行應用程序
首先,運行應用程序之前,你需要構建整個項目。
右鍵單擊該項目並選擇:
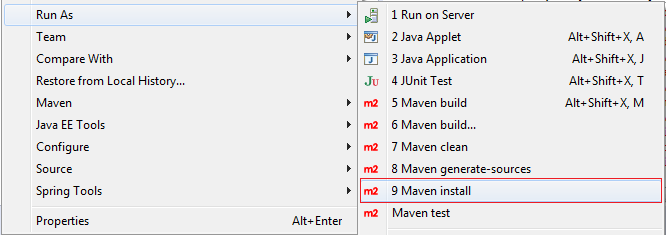
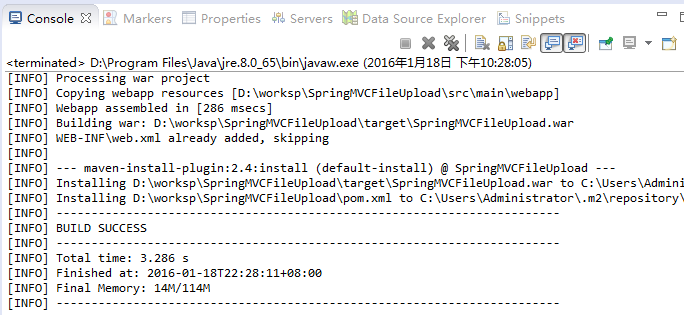
運行配置:
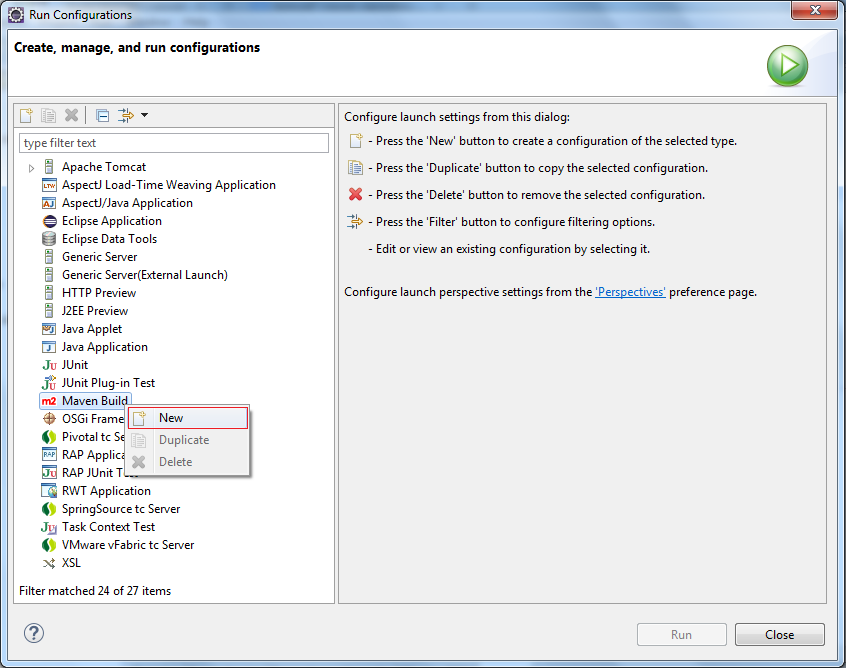
輸入:
- Name: Run SpringMVCFileUpload
- Base directory: ${workspace_loc:/SpringMVCFileUpload}
- Goals: tomcat7:run
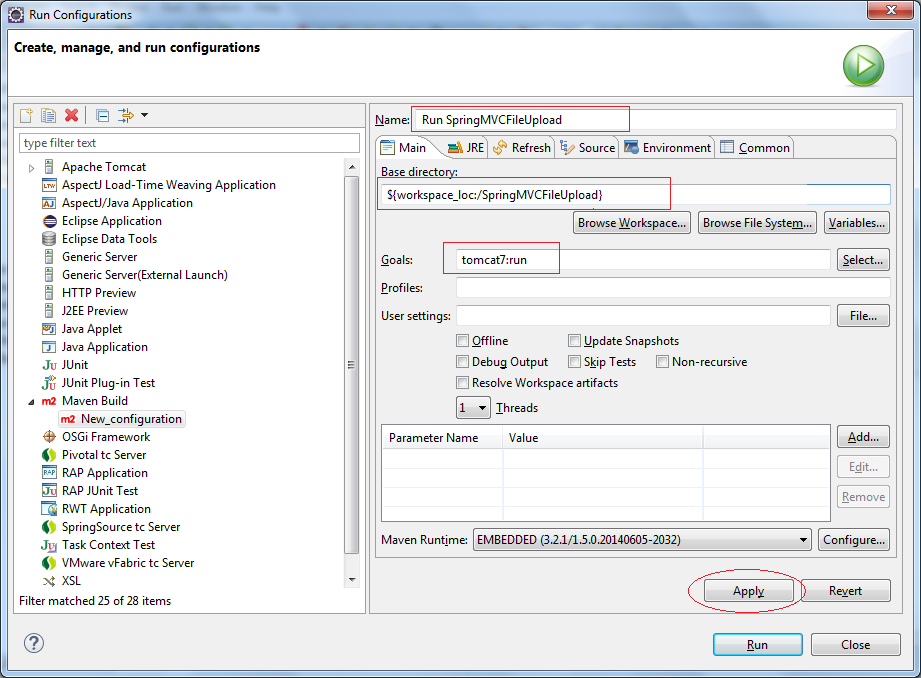
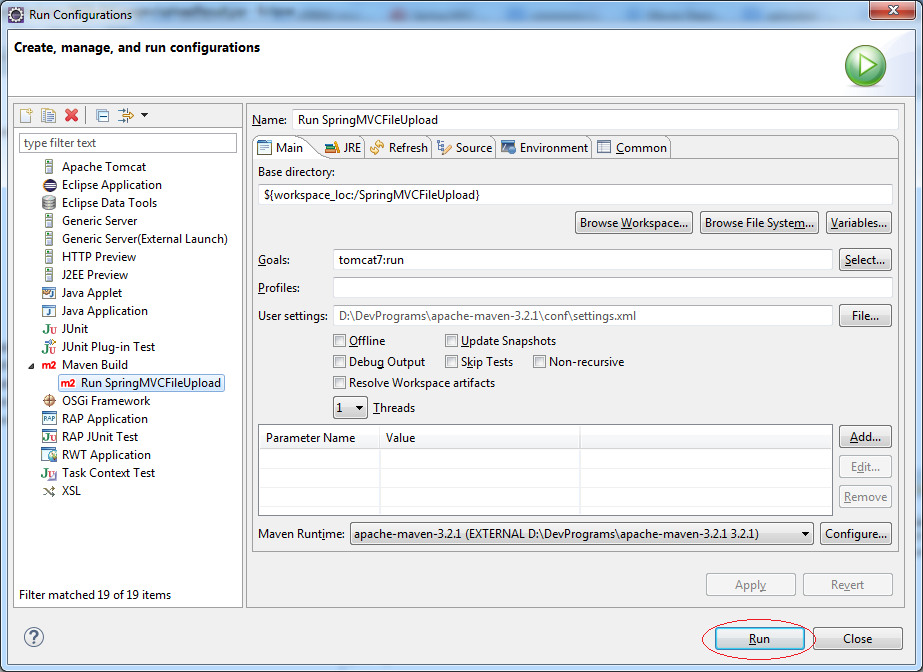
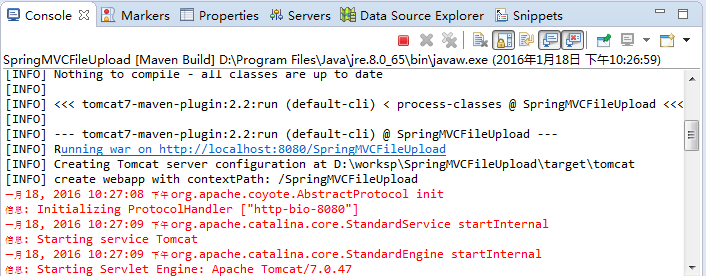
點擊運行(Run):
到此整個教程講解完成!代碼下載地址: http://pan.baidu.com/s/1eQQQP3c
