Cordova文件傳輸
這個插件是用於上傳和下載文件。
第1步 - 安裝文件傳輸插件
打開命令提示符,運行以下命令來安裝插件。
C:\Users\username\Desktop\CordovaProject>cordova plugin add cordova-plugin-file-transfer
第2步 - 創建按鈕
在本章中,我們將學習如何上傳和下載文件。讓我們創建index.html中兩個按鈕
第3步 - 添加事件監聽器
在index.js onDeviceReady函數內創建事件偵聽器。 增加點擊事件和回調函數如下。
document.getElementById("uploadFile").addEventListener("click", uploadFile);
document.getElementById("downloadFile").addEventListener("click", downloadFile);
步驟4A- 下載函數
這個功能將用於從服務器下載文件到設備。 我們演示上傳文件到 postimage.org。 你可能會使用自己的服務器。 這個函數放置在index.js並按下相應的按鈕時觸發。uri 是服務器下載鏈接以及 fileURI 路徑是設備上的DCIM文件夾。
function downloadFile() {
var fileTransfer = new FileTransfer();
var uri = encodeURI("http://s14.postimg.org/i8qvaxyup/bitcoin1.jpg");
var fileURL = "///storage/emulated/0/DCIM/myFile";
fileTransfer.download(
uri, fileURL, function(entry) {
console.log("download complete: " + entry.toURL());
},
  function(error) {
     console.log("download error source " + error.source);
     console.log("download error target " + error.target);
     console.log("download error code" + error.code);
  },

  false, {
     headers: {
        "Authorization": "Basic dGVzdHVzZXJuYW1lOnRlc3RwYXNzd29yZA=="
     }
  }
);
}
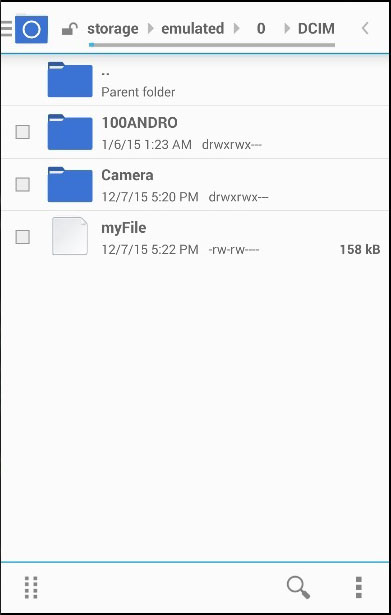
當我們按下下載按鈕,文件將從postimg.org服務器上下載到我們的移動設備。我們可以查看指定的文件夾,看到 myFile 是存在的。
控制檯輸出看起來就像這樣 -

步驟4B - 上傳函數
現在我們創建函數,選擇文件並將其上傳到服務器。再次,我們希望能夠儘可能簡化,所以將使用 posttestserver.com 在線服務器進行測試。uri的值將鏈接提交到 posttestserver。
function uploadFile() {
var fileURL = "///storage/emulated/0/DCIM/myFile"
var uri = encodeURI("http://posttestserver.com/post.php");
var options = new FileUploadOptions();
options.fileKey = "file";
options.fileName = fileURL.substr(fileURL.lastIndexOf('/')+1);
options.mimeType = "text/plain";
var headers = {'headerParam':'headerValue'};
options.headers = headers;
var ft = new FileTransfer();
ft.upload(fileURL, uri, onSuccess, onError, options);
function onSuccess(r) {
console.log("Code = " + r.responseCode);
console.log("Response = " + r.response);
console.log("Sent = " + r.bytesSent);
}
function onError(error) {
alert("An error has occurred: Code = " + error.code);
console.log("upload error source " + error.source);
console.log("upload error target " + error.target);
}
}
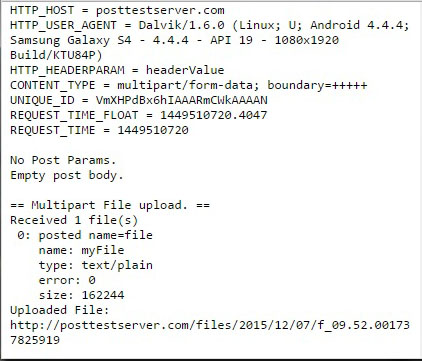
現在,我們可以按下UPLOAD 按鈕來觸發此函數。我們將得到的控制檯輸出,確認上傳成功。

我們也可以檢查服務器,以確定該文件已經被上傳了。
