JavaFX VBox
VBox佈局將子節點堆疊在垂直列中。新添加的子節點被放置在上一個子節點的下面。默認情況下,VBox尊重子節點的首選寬度和高度。
當父節點不可調整大小時,例如Group節點,最大垂直列的寬度基於具有最大優選寬度的節點。
默認情況下,每個子節點與左上(Pos.TOP_LEFT)位置對齊。
示例
以下代碼將TextArea控件設置爲在調整父VBox的高度時垂直增長:
TextArea  myTextArea = new TextArea();
VBox.setHgrow(myTextArea,  Priority.ALWAYS);
完整的代碼如下所示-
import javafx.application.Application;
import javafx.scene.Scene;
import javafx.scene.control.TextArea;
import javafx.scene.layout.Priority;
import javafx.scene.layout.VBox;
import javafx.scene.paint.Color;
import javafx.stage.Stage;

public class Main extends Application {
  @Override
  public void start(Stage primaryStage) {
    TextArea myTextArea = new TextArea();
    VBox hbox = new VBox();// from  W w W . y  i ib  Ai .c  o  M
    hbox.getChildren().add(myTextArea);
    VBox.setVgrow(myTextArea, Priority.ALWAYS);

    Scene scene = new Scene(hbox, 320, 112, Color.rgb(0, 0, 0, 0));
    primaryStage.setScene(scene);
    primaryStage.show();
  }

  public static void main(String[] args) {
    launch(args);
  }
}
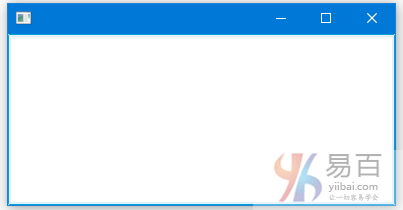
上面的代碼生成以下結果。

示例2
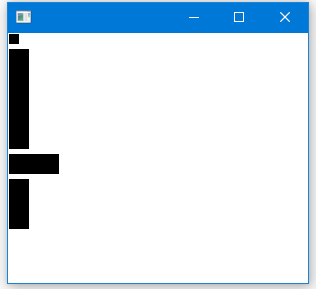
下面的代碼使用四個矩形來演示VBox的使用。
import javafx.application.Application;
import javafx.geometry.Insets;
import javafx.scene.Group;
import javafx.scene.Scene;
import javafx.scene.layout.HBox;
import javafx.scene.layout.VBox;
import javafx.scene.shape.Rectangle;
import javafx.stage.Stage;

public class Main extends Application {
    @Override
    public void start(Stage primaryStage) {
        Group root = new Group();
        Scene scene = new Scene(root, 300, 250);
        // 5 pixels space between child nodes
        VBox vbox = new VBox(5);
        // 1 pixel padding between child nodes only
        vbox.setPadding(new Insets(1));
        Rectangle r1 = new Rectangle(10, 10);
        Rectangle r2 = new Rectangle(20, 100);
        Rectangle r3 = new Rectangle(50, 20);
        Rectangle r4 = new Rectangle(20, 50);

        HBox.setMargin(r1, new Insets(2, 2, 2, 2));

        vbox.getChildren().addAll(r1, r2, r3, r4);
        root.getChildren().add(vbox);

        primaryStage.setScene(scene);
        primaryStage.show();
    }

    public static void main(String[] args) {
        launch(args);
    }
}
上面的代碼生成以下結果。

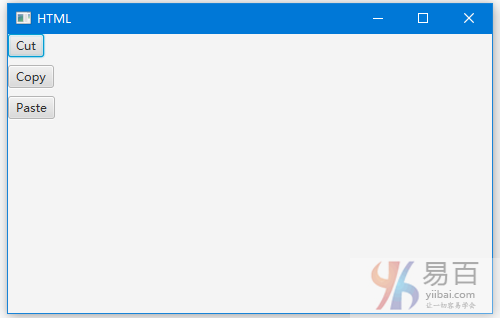
VBox間距
VBox vbox = new VBox(8); // spacing = 8
vbox.getChildren().addAll(new Button("Cut"), new Button("Copy"), new Button("Paste"));
完整的實現代碼如下所示 -
import javafx.application.Application;
import javafx.scene.Group;
import javafx.scene.Scene;
import javafx.scene.control.Button;
import javafx.scene.layout.VBox;
import javafx.stage.Stage;

public class Main extends Application {

    @Override
    public void start(final Stage stage) {
        stage.setTitle("HTML");
        stage.setWidth(500);
        stage.setHeight(500);
        Scene scene = new Scene(new Group());

        VBox vbox = new VBox(8); // spacing = 8
        vbox.getChildren().addAll(new Button("Cut"), new Button("Copy"), new Button("Paste"));

        scene.setRoot(vbox);

        stage.setScene(scene);
        stage.show();
    }

    public static void main(String[] args) {
        launch(args);
    }
}
上面的代碼生成以下結果。

設置填充和間距
import javafx.application.Application;
import javafx.geometry.Insets;
import javafx.scene.Scene;
import javafx.scene.control.Button;
import javafx.scene.control.Label;
import javafx.scene.layout.VBox;
import javafx.scene.text.Font;
import javafx.scene.text.FontWeight;
import javafx.stage.Stage;

public class Main extends Application {
    public static void main(String[] args) {
        Application.launch(args);
    }

    @Override
    public void start(Stage primaryStage) {
        primaryStage.setTitle("VBox Test");

        // VBox
        VBox vb = new VBox();
        vb.setPadding(new Insets(10, 50, 50, 50));
        vb.setSpacing(10);

        Label lbl = new Label("VBox");
        lbl.setFont(Font.font("Amble CN", FontWeight.BOLD, 24));
        vb.getChildren().add(lbl);

        // Buttons
        Button btn1 = new Button();
        btn1.setText("Button1");
        vb.getChildren().add(btn1);

        Button btn2 = new Button();
        btn2.setText("Button2");
        vb.getChildren().add(btn2);

        Button btn3 = new Button();
        btn3.setText("Button3");
        vb.getChildren().add(btn3);

        Button btn4 = new Button();
        btn4.setText("Button4");
        vb.getChildren().add(btn4);

        // Adding VBox to the scene
        Scene scene = new Scene(vb);
        primaryStage.setScene(scene);
        primaryStage.show();
    }
}
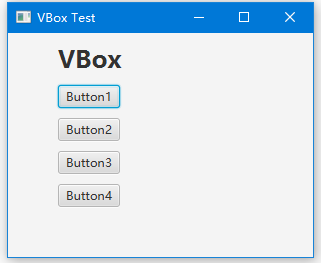
上面的代碼生成以下結果。
